The image grid widget helps you to display your images in a unique way. Image Grid Widget for Elementor comes in 2 different styles (more coming).
Step 1
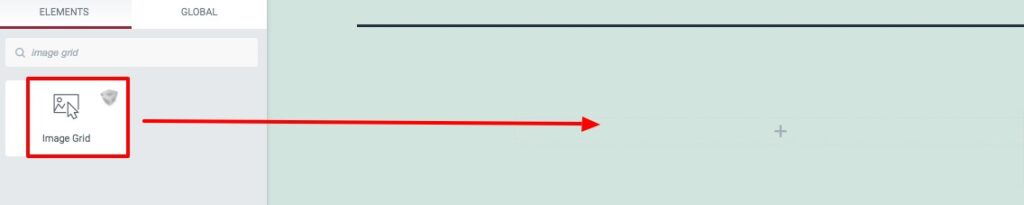
To use our Image Grid widget, at first create a section by clicking on the “+” icon on Elementor and then from the block section of the left bar search for Image Grid. Drag the Image Grid block and drop it into your created section.
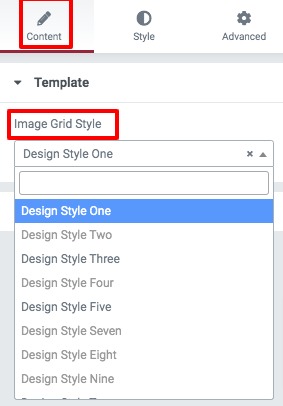
Now under the Content tab from the Template menu, you can select the image grid presets. There are multiple presets available. You can see all the demos from here.
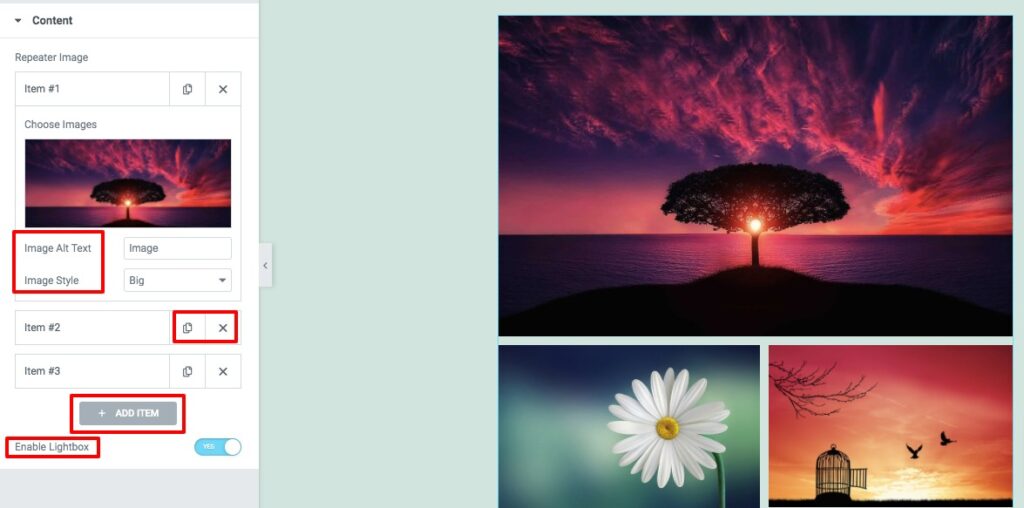
From the content option, you can add the item to your image grid section. Click on the Add Item button to add a new item. You can copy any item by clicking on the Copy icon or delete an item using the delete icon. Click any of the items to select your image. Upload your image and then add image alt text. There is an option to set image style. You can set the style of your images as –
- None
- Wide
- Tall
- Big
You can also enable or disable the image lightbox features.
Step 2
Move on to the style tab where you will find different options to style up your image grid section.
Images
From here you can add padding and set image width. After that, you can add border type, border color, border-radius, and box-shadow for the images. You can also enable the filter value. There are different filter effects available like –
- Brightness
- Contrast
- Grayschale
- Invert
- Opacity
- Saturate
- Sepia
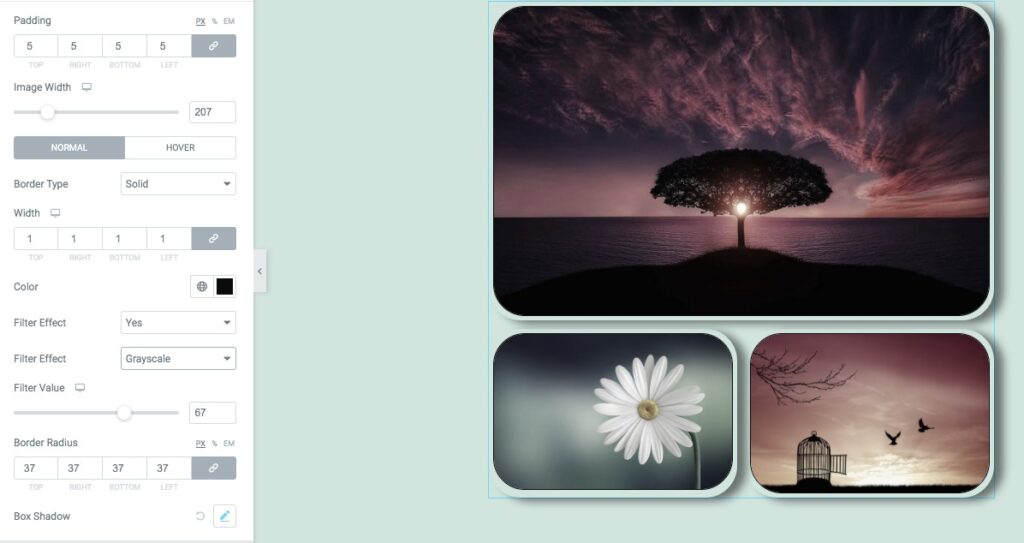
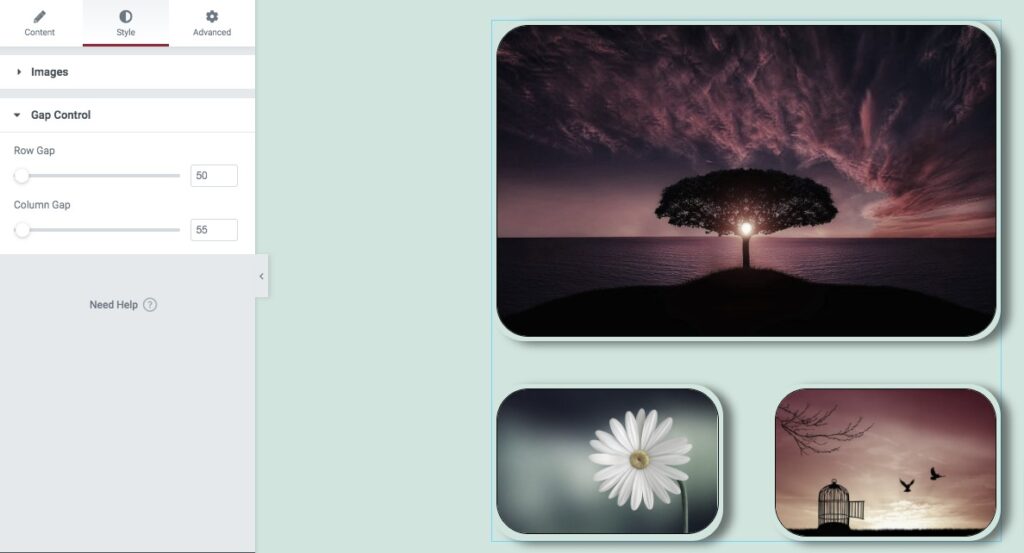
Gap Control
From the gap control option, you can set the row and column gap.
Great! Your image grid section is ready to use.